Orchids – 5IN Tabon – White
Care:
Care:
Simply follow our top tips to ensure they stay healthy for as long as possible...

Did you purchase a single plant or a garden? There are many different orchid sizes and concepts. Follow the watering advice given with your plant purchase. Orchids are epiphytic plants that attach themselves to trees.
When giving water using the SimpleShot Glass, be aware about the size of orchid you bought. Mini orchids in 2.5 inch pot need 1.5oz of water weekly. Orchids in 5 inch pots instead need 3oz of water per week.

The grow pot of the orchid is transparant, therefore you can see the roots of the plant clearly. If the roots are green and wet, do not give water, but wait a few more days. If the roots are more light green to grey color you need to water the orchid right away.

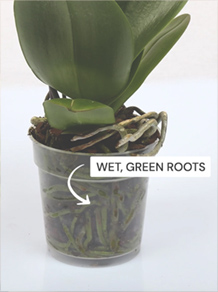
Orchid roots have a sponge like coating called velamen. Velamen appears green and thick when wet. If your orchid's roots look like this, do not water your orchid.
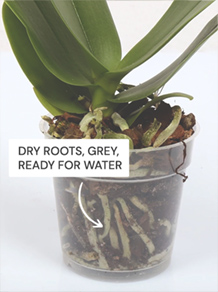
Orchid roots have a sponge like coating called velamen. Velamen appears grey and shriveled when dry. If your orchid's roots look like this, water immediately.
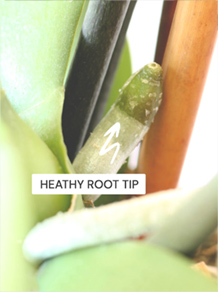
The tips of your roots should be green, while the velamen around the roots should begin to turn grey as they begin to dry.
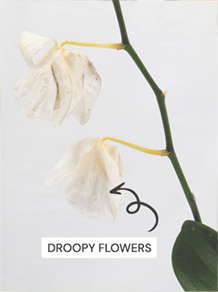
If your orchid is dry, your flowers may begin to droop. The dorsal petals will begin to fall backwards. Different varieties react in different ways.

If your orchid becomes too dry, the flowers will begin to look shriveled and transparent.

Orchids do not like direct sun. They require low light levels, but they do need sunlight. It is possible for them to survive in offices but they may struggle. Avoid placing your orchid on windowsills because of the direct light.
Buds and flowers may begin to wilt if your plant does not receive enough sunlight. Do not mistake this for under watering. To put this into some perspective, direct sunlight outdoors can measure at 10,000 foot candles and orchids like 1,500 foot candles.

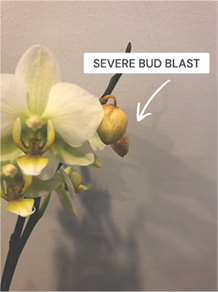
Issues with light can often be hard to identify. A common symptom of lack of light is bud blast. If you are watering correctly and continue to see bud loss, your orchid may need more light.

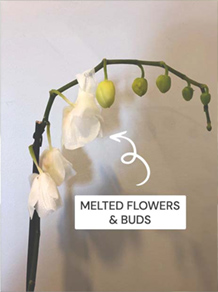
Despite what you may hear, orchids do not like ice. This probably comes at no surprise considering orchids are grown in temperatures of 82 F for over a year.
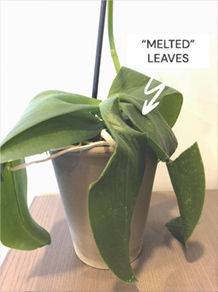
It is ok to go too warm, but its possible to experience damage beneath 60 F. This may cause burns to appear on your leaves. Leaving an orchid in a hot car can kill your plant so be careful when you transport your orchid.
GOOD TO KNOW: Orchids do not like changing temperatures and wind. Keep in mind to protect your orchid while ventilating your room.

During high temperatures and in times of low humidity you can spray the leaves of your orchid with mist. The leaves of your plants will look more fresh and healthy.

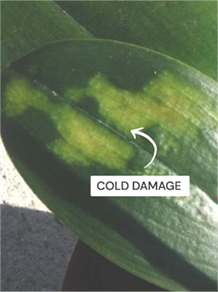
Chilling injury appears in different forms on the leaves. This is an example of chilling injury.
The tips of your roots should be green, while the velamen around the roots should begin to turn grey as they begin to dry.

Did you know it took over 2 years to grow your orchid? Our orchids are grown in high temperatures and high humidity inside modern greenhouses. Once fully matured, the orchids are moved into a colder temperature which causes the orchid to bloom. It takes 20 weeks until the flowers begin to open. Once the buds have fully developed, it takes 3-4 days for a bud to open into a flower. This means that if your orchid has 10 buds, it should take roughly 30 days before all the flowers have opened.
White orchids tend to last longer than other colors. As the blooms begin to wilt and fall, you should begin to see the oldest (bottom) flower on the stem wilt first.

To prepare your orchid for the flower break you should remove wilted flowers and keep the stems as long as they are still green. The plant will send all energy from the stems back into the roots. Only when the stems are getting brown you should cut them down at the stem base.

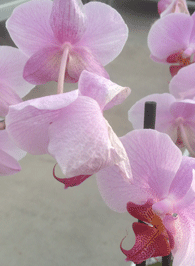
At the end of your orchid's bloom cycle, the blooms will begin to wilt and fall off. This should start with the oldest (lower) flowers first.
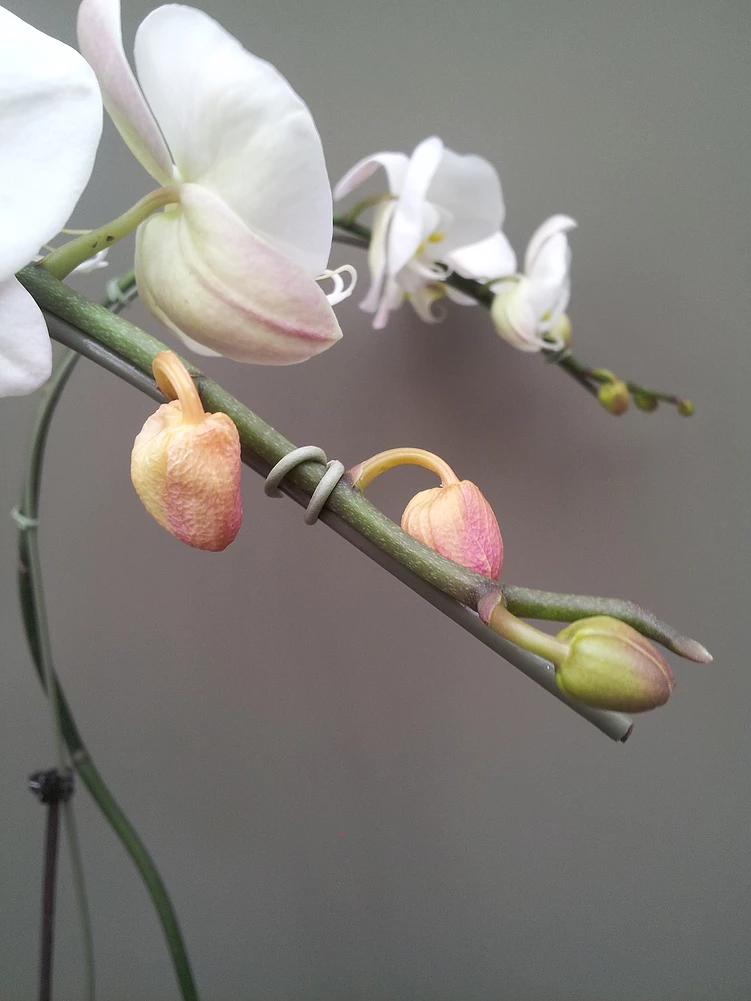
If "puffy" buds begin to wilt before opening, you will most likely need to change something regarding water or light.
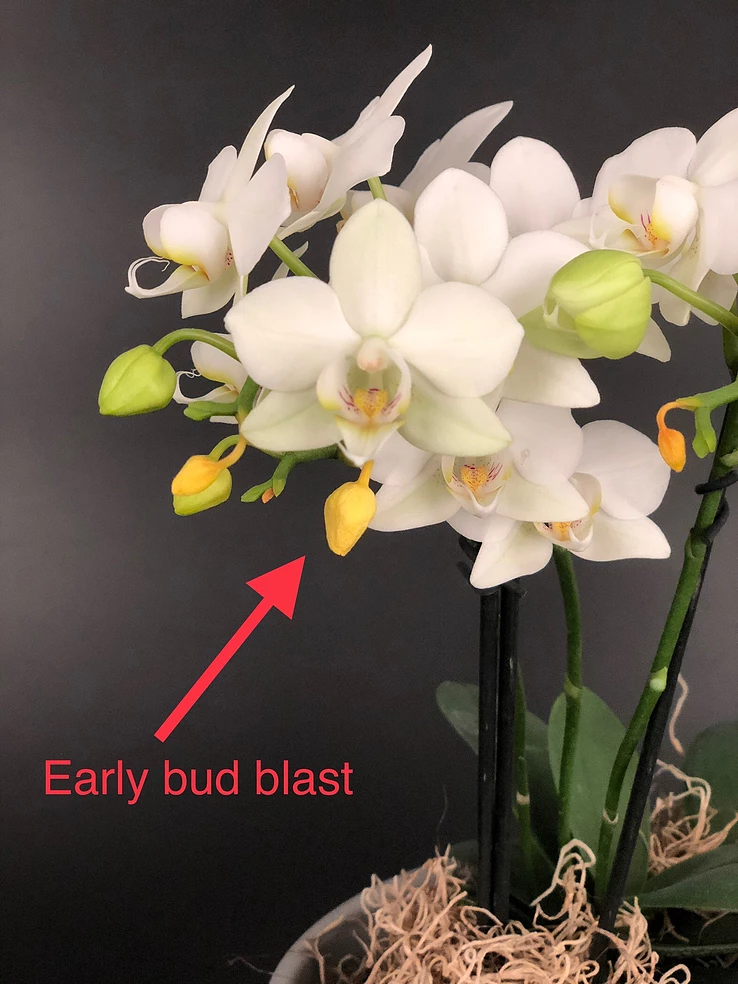
All buds should open into flowers. There are times when buds are too tight (small) and are sensitive to climate change. The move from the greenhouse to your home can cause bud blast due to the climate change.
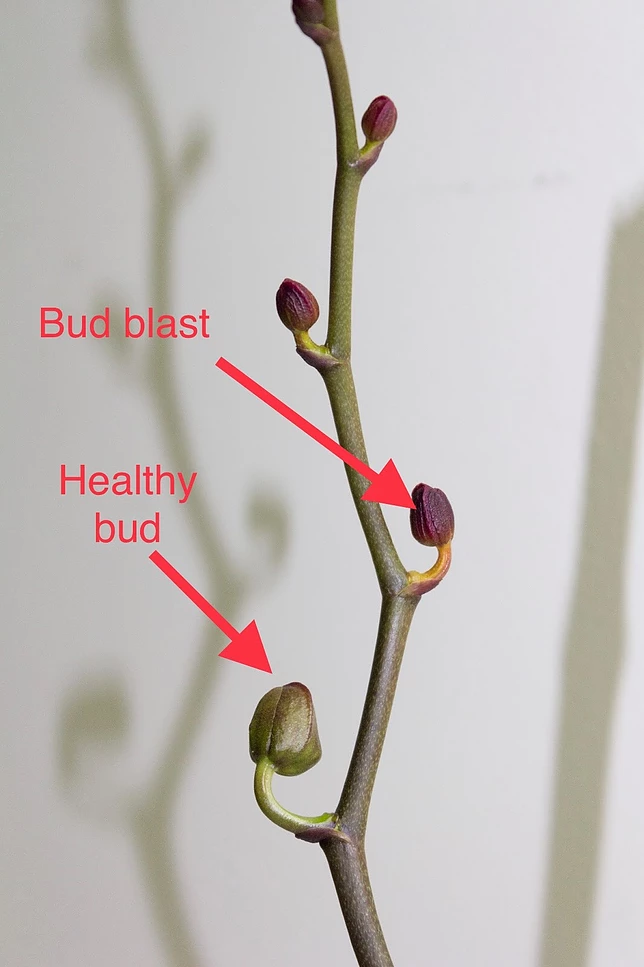
Bud Blast can often be caused by under watering and over watering. If you are under watering, the youngest buds (furthest away from the plant) will begin to die first. Until all buds have opened into flowers, do not forget to water and be sure to not over water.
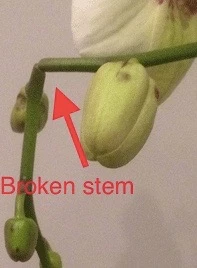
Many times a broken, damaged, or kinked stem can end your plant's bloom life prematurely. All these things will prevent water from reaching your flowers. If this happens, remove the piece of damaged stem.

It is not necessary to add fertilizer to your water or feed your orchid. At the greenhouse, we give low amounts of fertilizer and your orchid has plenty of energy to continue its bloom cycle.
You can find special orchid feeds online.

After the flowering period each orchid takes a break. During this time you do not need to give any fertilizer.

Orchids are a much better value than cut flowers if you look at the cost per day of having flowers in your home. After your blooms have fallen, we recommend purchasing a new orchid to replace it. It takes a long time to grow orchids inside a greenhouse at high temperatures and high humidity levels. If you wish to repot your orchid, find bark from a local garden center and
Be careful not to damage the roots when repotting. You may keep the original substrate to avoid damaging the roots. Alternatively, you can remove the old substrate from around the roots. Cut off all dead roots.

Wait until the blooms have fallen so as to not disrupt the plant. Once you have potted your plant, it is advisable to re-pot every two years or so in the spring to give your orchid the best potential to flourish again.

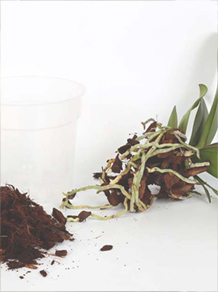
Removing all the bark or sphagnum can be a challenge and it can damage the roots. It is better to remove the loose substrate only.

Many orchid owners desire to bring back the blooms of their orchids. While there are few easy tricks, it can often take months before getting your orchid to re-bloom, and even then, its not guaranteed. The chances of your orchid re-blooming is determined by its age, which is measured by the number of leaves. Every leaf of your orchid has a reproductive bud which can turn into a spray of flowers. This leaf must be mature and usually requires to have a minimum of two leaves above it before it can spike.
This will often work and provide you with a few more flowers. If this doesn't work, cut the stem a few inches from the base of the plant and keep your orchid in warm conditions. Continue to water according to the supplied care instructions and after several months, move your orchid someplace with more light and is a little cooler (60 - 65 degrees). It will take up to 6 weeks before you begin to see a stem at the base of the plant.

If you cut the stem low down, the plant will produce a larger bloom, but it may take longer to develop. If you want a 'quick fix', cut just above the node below the lowermost previous branch or flower. A new branch should develop fairly quickly with little effort. If new flowers don't appear in two-three months, try moving the plant to a cooler place to trigger reflowering.

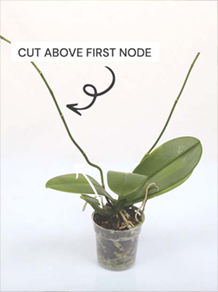
Do not confuse new roots with new stems. New roots grow from the base of the plant just below the oldest, bottom leaf.
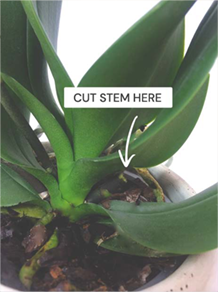
Once your orchid has dropped all of its blooms, cut the stem back a few inches from the base of the plant.
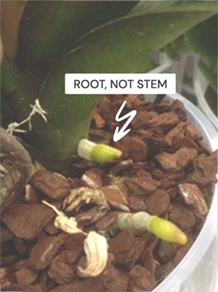
Do not confuse new roots with new stems. New roots grow from the base of the plant just below the oldest, bottom leaf.

It is possible that your orchid can get a fungus or bacteria which may cause damage or kill your plant.
It many cases, once the plant has a disease, it will kill your plant. To avoid this from happening, be very careful of overwatering your plant. Pests are often easily treatable. Use the the below pictures to help identify pests and learn how to treat them.

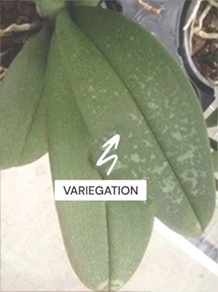
Some varieties of orchids have variegated leaves which is normal and does not harm your plant. Be careful not to mistake variegation for a disease or other problem
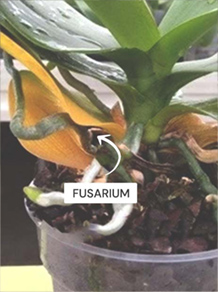
Yellowing leaves can be a symptom of an old leaf, which can be removed, or fusarium, which may ultimately end up killing your plant. Fusarium (crown rot) is very difficult to cure. If more than one leaf of your orchid turns yellow, your orchid probably has fusarium. The best thing to do to help cure fusarium is to keep your orchid on the dry side.
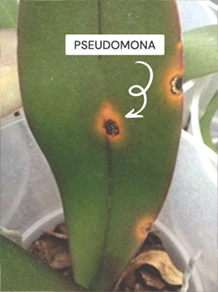
Pseudomona appears in the form of black spots surrounded by yellow. Remove the infected areas then gently wipe your orchid leaves with a clorox wipe