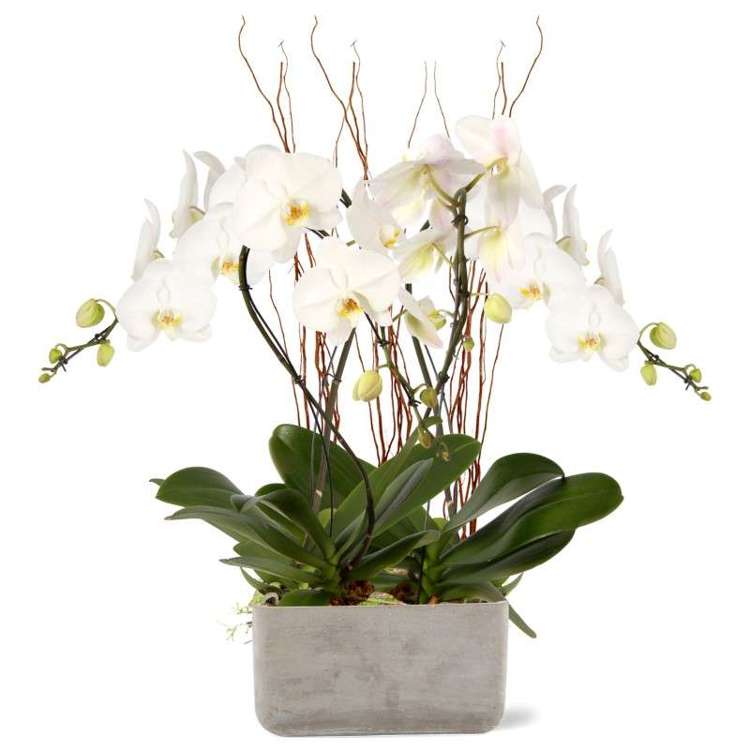
Niagara
Care:

Care Instructions

Light
Orchids do not like direct sun. They require low light levels, but they do need sunlight. It is possible for them to survive in offices but they may struggle. Avoid placing your orchid on windowsills because of the direct light. Try coffee tables or kitchen islands. Buds and flowers may begin to wilt if your plant does not receive enough sunlight. Do not mistake this for under watering. To put this into some perspective, direct sunlight outdoors can measure at 10,000 foot candles and orchids like 1,500 foot candles.

Care Instructions
Temperature
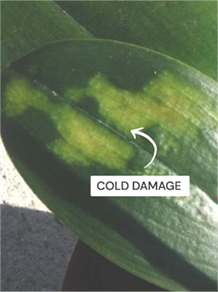
Despite what you may hear, orchids do not like ice. This probably comes at no surprise considering orchids are grown in temperatures of 82 F for over a year. It is best to keep your orchid between 60 F and 80 F. It is ok to go too warm, but its possible to experience damage beneath 60 F. This may cause burns to appear on your leaves. Leaving an orchid in a hot car can kill your plant so be careful when you transport your orchid.

Care Instructions

Watering
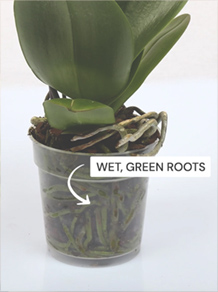
Because orchids are epiphytic plants, they do not require daily waterings. In fact, an orchid is a great vacation plant as it typically only needs to be watered once a week. Water your orchid with 12 ounces (or four shots of the Simple Shot Glass) of room temperature water once a week. The grow pot of the orchid is transparant, therefore you can see the roots of the plant clearly. If the roots are green and wet, do not give water, but wait a few more days. If the roots are more light green to grey color you need to water the orchid right away.

Care Instructions

Fertilizer
It is not necessary to add fertilizer to your water or feed your orchid. At the greenhouse, we give low amounts of fertilizer and your orchid has plenty of energy to continue its bloom cycle. If you would like to add fertilizer, do not add much fertilizer. You can find special orchid feeds online.

Care Instructions

Repotting
Orchids are a much better value than cut flowers if you look at the cost per day of having flowers in your home. After your blooms have fallen, we recommend purchasing a new orchid to replace it. It takes a long time to grow orchids inside a greenhouse at high temperatures and high humidity levels. If you wish to repot your orchid, find bark from a local garden center and pot into a larger pot that is only 1-2" larger than your current pot. Be careful not to damage the roots when repotting. You may keep the original substrate to avoid damaging the roots. Alternatively, you can remove the old substrate from around the roots. Cut off all dead roots.

Care Instructions

Reblooming
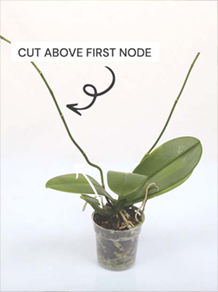
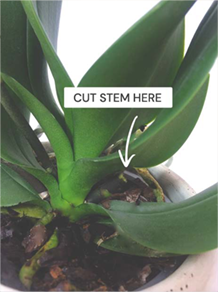
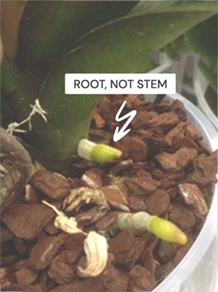
Many orchid owners desire to bring back the blooms of their orchids. While there are few easy tricks, it can often take months before getting your orchid to re-bloom, and even then, its not guaranteed. The chances of your orchid re-blooming is determined by its age, which is measured by the number of leaves. Every leaf of your orchid has a reproductive bud which can turn into a spray of flowers. This leaf must be mature and usually requires to have a minimum of two leaves above it before it can spike. We recommend cutting the orchid stem above one of its "nodes" to encourage the plant to grow a branch with flowers. This will often work and provide you with a few more flowers. If this doesn't work, cut the stem a few inches from the base of the plant and keep your orchid in warm conditions. Continue to water according to the supplied care instructions and after several months, move your orchid someplace with more light and is a little cooler (60 - 65 degrees). It will take up to 6 weeks before you begin to see a stem at the base of the plant.

Care Instructions

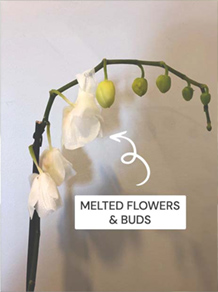
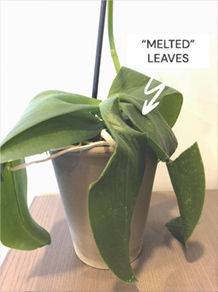
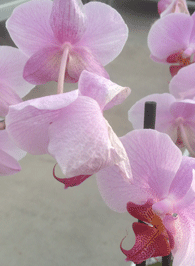
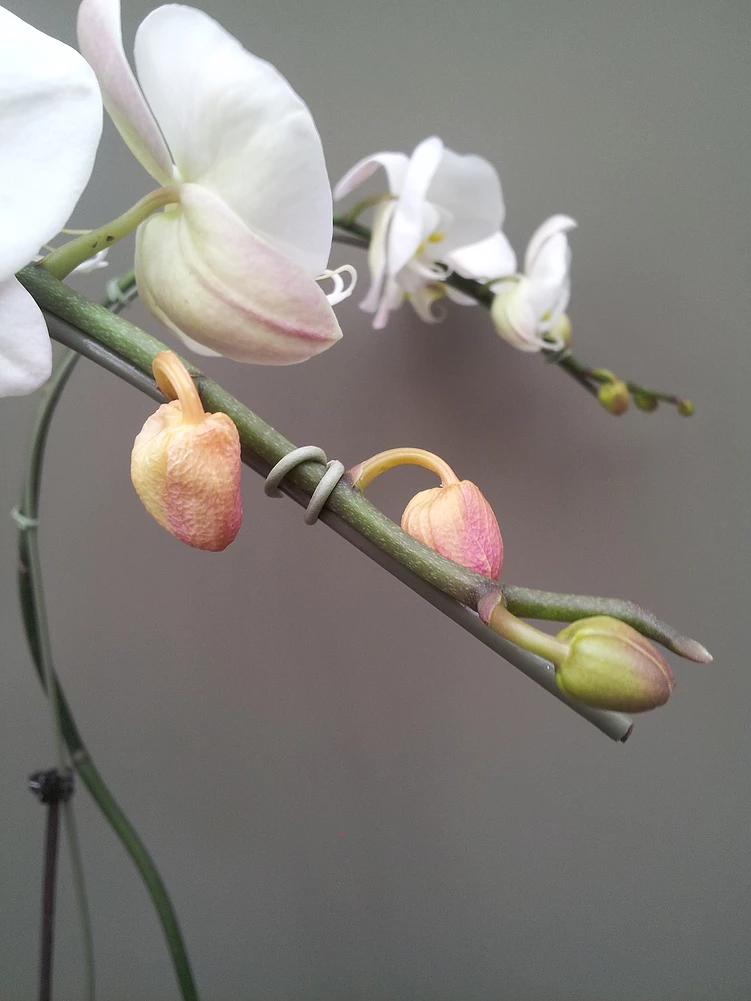
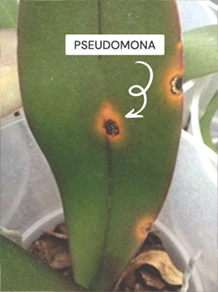
Pests and diseases
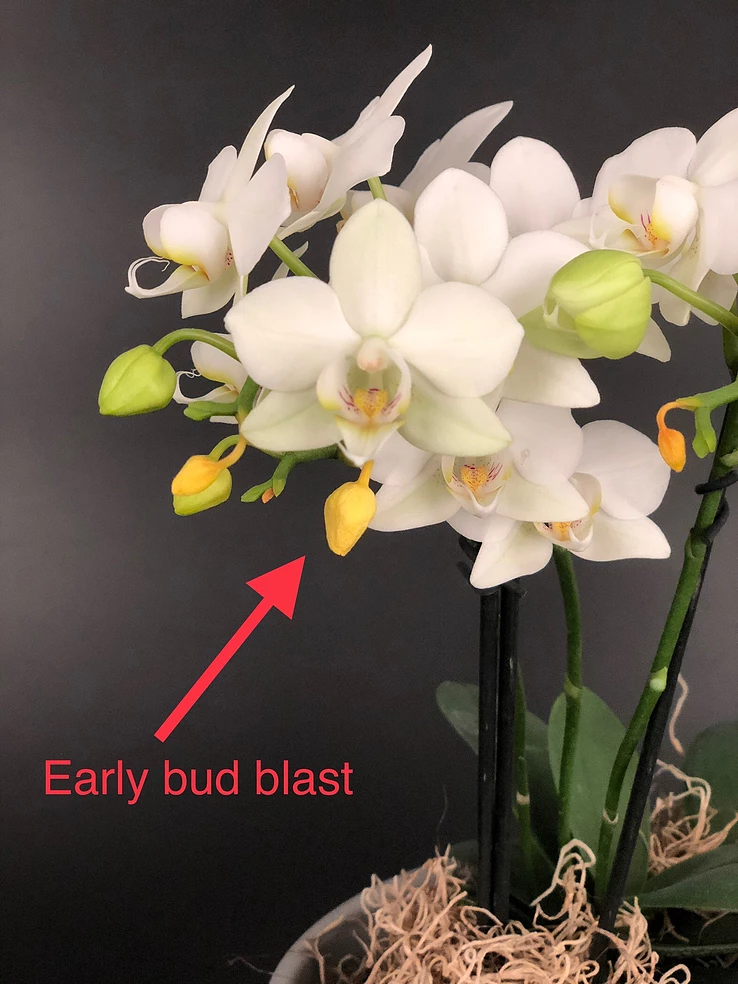
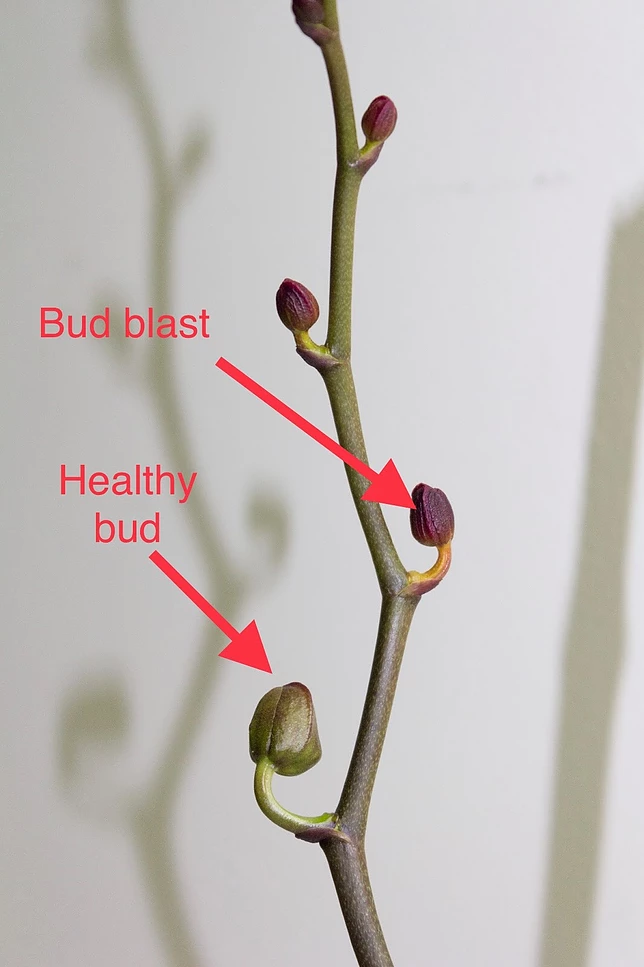
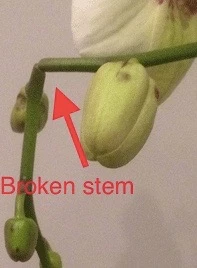
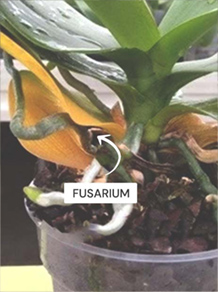
It is possible that your orchid can get a fungus or bacteria which may cause damage or kill your plant. We recommend using the images below to diagnose your problem and then follow our advice. It many cases, once the plant has a disease, it will kill your plant. To avoid this from happening, be very careful of overwatering your plant.